Azure Client VPN using Azure AD & MFA
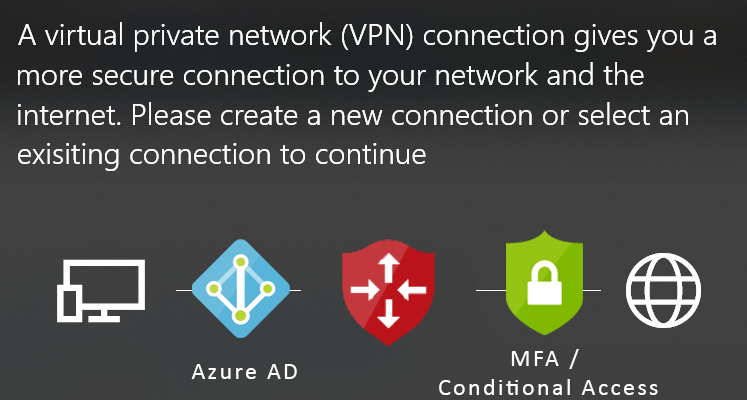
Azure Virtual Network Gateway provides the ability to connect to your Azure Virtual Network with Azure Client VPN (SSL) connections using your Azure AD or hybrid identity, with Multi Factor Authentication (MFA) and your Conditional Access policies.
We can have an Enterprise grade SSL VPN, with Active Directory authentication and Single Sign on (SSO) from your corporate laptops and apply all your conditional access policies, like MFA, Compliance devices, trused locations, etc.
How to create the VPN Gateway
Go to your Virtual Network’s subnets and create a Gateway subnet by clicking the “+ Gateway subnet”
Create a Virtual network gateway, by searching for the “Virtual network gateways” service and press Add.

Select “VPN”, “Route-based” and at the SKU select any size except the Basic. Basic SKU does not support Azure AD authentication.

Create a Public IP and leave all other settings default and create the Gateway.

After about 20 minutes the VPN Gateway is ready. In the meantime we will prepare the Azure AD and give concern to use the Azure AD with the Azure client VPN. Using a Global Admin account, go to the “Azure Active Directory” and copy the “Tenant ID” from the Overview blade, and keep it on a notepad.

Then copy the url and paste the below url to your browser’s address bar. You need to log in with a Global Admin non guest non Microsoft account.
With a guest or Microsoft account, even if it is Global Admin, you will be propted to login with an admin account, meaning a member work account.

Once you login with a member work Global Admin account, you can accept the permissions to create the Azure VPN application

You can navigate to the Azure Active Directory / Enterprise Application and view / manage the Azure AD application.

Open the Azure VPN enterprise application and copy the “Application ID” to a notepad.

Go to the VPN Gateway, select the “Point to site configuration” and click the “Configure now”

Add the Address Pool that you want the VPN clients to have, for Tunnel type select “OpenVPN (SSL) as it is the only type that supports Azure AD authentication.
Then use the details that you have copied to the notepad, the Tenant ID and the Application ID, and add them to the required fields and press save.
- Tenant: https://login.microsoftonline.com/paste-your-tenant-id-here
- Audience: paste-the-azure-vpn-application-id-here
- Issuer: https://sts.windows.net/paste-your-tenant-id-here/

How to Download the VPN Client and Connect to the Gateway
Download the VPN client, using the button.

Extrack the downloadded zip file

And at the AzureVPN folder you will find the configuration xml.

Open the Microsoft Store and get the Azure VPN Client

Open the Azure VPN Client and at the lower left corner, press the + and Import the xml configuration file

accept all the settings and press save

The Azure VPN connection will appear at the Azure VPN client and also at the Windows 10 network connections, like any other VPN
Azure VPN Client:

Windows 10 Network Connections:

Once you press connect, it will prompt you to connect using the account(s) that you are already using at your Windows 10 machine, or use a different account

You will be prompted for MFA or any other conditional access policy you have applied, and the you will be connected.

Conditional Access & Multi-Factor Authentication (MFA)
You can add Conditional Access to the Azure client VPN connection. Go to Azure Active Directory / Security / Conditional Access and create a new Policy.
Select the “Azure VPN” at the “Cloud apps or actions” section


At the Access Controls / Grand section, you can require multi-factor authentication, or AD Joined device, or compliant device, or all of that

At the “Conditions” section you can controll the location that the policy will apply. Lets say, you can apply the MFA requirement at “Any location” and exclude the “Trusted locations”, in order to not require MFA when the device is at a trusted location, like your company’s network.


Pantelis Apostolidis is a Sr. Specialist, Azure at Microsoft and a former Microsoft Azure MVP. For the last 20 years, Pantelis has been involved to major cloud projects in Greece and abroad, helping companies to adopt and deploy cloud technologies, driving business value. He is entitled to a lot of Microsoft Expert Certifications, demonstrating his proven experience in delivering high quality solutions. He is an author, blogger and he is acting as a spokesperson for conferences, workshops and webinars. He is also an active member of several communities as a moderator in azureheads.gr and autoexec.gr. Follow him on Twitter @papostolidis.


So I’ve now done this like 6 times…
Every user I try to connect with gets this error.
Failure in acquiring AAD Token:Provider Error 87: The parameter is incorrect.
9/10/2021 5:35:29 PM: Provider Error 87: The parameter is incorrect.
9/10/2021 5:35:26 PM: Requested AccountsManager dialog.
9/10/2021 5:35:26 PM: Dialing VPN connection rgDevInsitesWeb-vnet
Hi Joshua,
can you try the below two troubleshooting steps:
1. Clear the Networking caches
Run windows cmd window (click windows start menu, type ‘cmd’, right click on ‘Command Prompt’ and select “Run as Administrator”).
type command below
netsh int ip reset
then type
netsh int ipv6 reset
then type
netsh winsock reset
Restart your computer.
2. Reset Device Manager adaptors
Open Device Manager
Find Network Adapters
Uninstall WAN Miniport drivers (IKEv2, IP, IPv6, etc)
Click Action > Scan for hardware changes
The adapters you just uninstalled should come back
and try again?