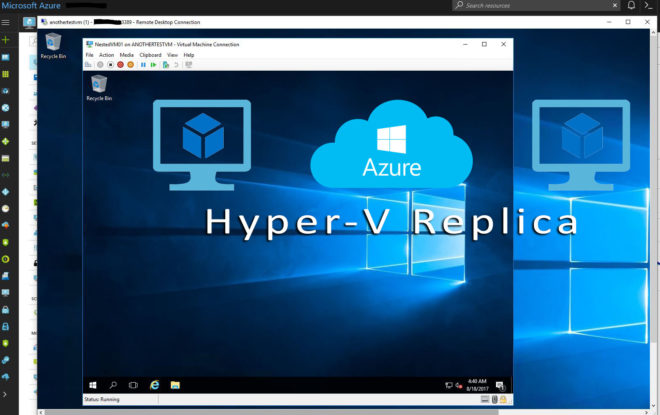
Microsoft Azure Nested Virtualization | Hyper-V Replica on Azure
With the new Dv3 and Ev3 VM sizes Microsoft has released the Nested Virtualization, meaning you can simply have a Hyper-V VM inside an Azure VM. I have created a set of posts to explore the Nested Virtualization functionality. Of course nested virtualization is only supported in Windows Server 2016.
Microsoft Azure Nested Virtualization
After the Microsoft Azure Nested Virtualization | Hyper-V VM inside Azure VM post on how to create a Nested VM inside an Azure VM, I am following with how to have Hyper-V Replica on Azure.
To accomplish this we will use the Azure VM and the Nested VM from the Microsoft Azure Nested Virtualization | Hyper-V VM inside Azure VM post. The first step is to create an identical pair of Azure VM and Nested VM to use for replica server. The only requirement is that the two Azure VMs must have network connectivity. As you understand we can have Hyper-V Replica between two Azure VMs at different Azure Regions using VPN.
Next, at both Azure VMs open the 443 port at both the NSG and the Windows Firewall. For more security we can add the Public IPs of the VMs as Source.
Since the VMs are not part of a domain we need to use Certificate based authentication for the Hyper-V Replica. We will use the New-SelfSignedCertificate command to create both certificates.
The certificate process
First we need to create a root CA certificate, so login at the first host and run:
New-SelfSignedCertificate -Type "Custom" -KeyExportPolicy "Exportable" -Subject "CN=myazurerootca" -CertStoreLocation "Cert:\LocalMachine\My" -KeySpec "Signature" -KeyUsage "CertSign"

Next, using the certificate Thumbprint of the root CA certificate, create two server certificates, one for each Azure VM. To accomplish this run:
New-SelfSignedCertificate -type "Custom" -KeyExportPolicy "Exportable" -Subject "CN=anothertestvm" -CertStoreLocation "Cert:\LocalMachine\My" -KeySpec "KeyExchange" -TextExtension @("2.5.29.37={text}1.3.6.1.5.5.7.3.1,1.3.6.1.5.5.7.3.2") -Signer "Cert:LocalMachine\My\6A7196D9759FC2F7C49D62E08FA7195310DE5EB7" -Provider "Microsoft Enhanced RSA and AES Cryptographic Provider"

New-SelfSignedCertificate -type "Custom" -KeyExportPolicy "Exportable" -Subject "CN=anothertestvm2" -CertStoreLocation "Cert:\LocalMachine\My" -KeySpec "KeyExchange" -TextExtension @("2.5.29.37={text}1.3.6.1.5.5.7.3.1,1.3.6.1.5.5.7.3.2") -Signer "Cert:LocalMachine\My\6A7196D9759FC2F7C49D62E08FA7195310DE5EB7" -Provider "Microsoft Enhanced RSA and AES Cryptographic Provider"

The next step is to open the Certificates mmc (Local Computer) and at the Personal container you will find the three certificates created above.

Right click each certificate and Export it, including the Private key, to a folder

Copy the certificates to the second Azure VM and import them. The root CA certificate needs to be imported to he Trust Root Certification Authorities and the other two to the Personal (or just use automatic placement).

Finally we need to disable the Certificate revocation check for Replication on both Azure VMs. To do this run the following command on both Azure VMs:
REG ADD "HKLM\SOFTWARE\Microsoft\Windows NT\CurrentVersion\Virtualization\Replication" /v DisableCertRevocationCheck /d 1 /t REG_DWORD /f

The Hyper-V Replica process
Lets start creating the Hyper-V Replica. Since Hyper-V Replica uses computer names, we need to use the host file to bind the Public IPs with the computer names. So, at the first Azure VM, open an elevated Notepad, browse to the path “C:\Windows\System32\drivers\etc”, and open the “hosts” file. Enter the Public IP of the second Azure VM following by the computer name. Do the same at the second Azure VM.

After saving the host file, go to the Hyper-V Settings, go to the “Replication Configuration” and check the “Enable this computer as a Replica Server”. Then check the “Use certificate-based Authentication (HTTPS)” and select the certificate created before. Finally check the “Allow replication from any authenticated servers” and press OK. Do this at both Azure VM Hyper-V Servers.

Next go to the Hyper-V manager, right click the Nested VM and choose “Enable Replica”. Enter the name of the second Azure VM and select the certificate.

I just used the defaults at all the next screens and finally press finish to enable the replication.

Once the replication is enabled you will see the “Replication enabled successfully” message and the Status will change to “Sending Initial Replica”.

After a very short period of time, the VM will complete the initial sync.


Pantelis Apostolidis is a Sr. Specialist, Azure at Microsoft and a former Microsoft Azure MVP. For the last 20 years, Pantelis has been involved to major cloud projects in Greece and abroad, helping companies to adopt and deploy cloud technologies, driving business value. He is entitled to a lot of Microsoft Expert Certifications, demonstrating his proven experience in delivering high quality solutions. He is an author, blogger and he is acting as a spokesperson for conferences, workshops and webinars. He is also an active member of several communities as a moderator in azureheads.gr and autoexec.gr. Follow him on Twitter @papostolidis.

